Shop
And Learn
  • Shop
  • Learn
  • hello@kobee.com.au
  • Track Your Order
  • Register or Sign in
0
Kobee
  • 0
  • Shop
    • 3D Printing
      • Back
      • All Filament
      • PLA Filament
      • PETG Filament
      • Speciality Filament
      • 3D Printer Tools
      • Replacement Parts
      • Nozzles
    • Components
      • Back
      • Relays
      • Power and Batteries
      • LEDs and Illumination
      • LCDs and OLEDs
      • Resistors
      • Capacitors
      • Connectors
      • Logic
      • Transistors
      • Diodes
      • ICs
      • Potentiometers
      • Motors and Drivers
      • Headers and Terminals
      • Buttons and Switches
    • Sensors
      • Back
      • Capacitive Sensors
      • Current Sensors
      • Temperature Sensors
      • Humidity Sensors
      • RFID
      • Infrared Sensors
      • Sensor Kits
    • Brands
      • Back
      • Arduino
      • Creality
      • Espressif (ESP)
      • Lilypad
      • Makey Makey
      • Wemos
    • Cables and Cable Management
      • Back
      • Heat Shrink
      • Hookup Wires
      • Cable Ties
      • USB Cables
    • Paper and Adhesives
      • Back
      • Hot Glue
      • Tape
      • Stickers and Labels
      • Sticker Paper / Vinyl
      • Card Stock
    • Tools
      • Back
      • Containers and Enclosures
      • Multimeters and Voltmeters
      • Soldering
      • Instruments
    • Development Tools
      • Back
      • Microcontrollers
      • Prototyping Boards
      • Wireless
      • Programmers
      • Development Kits
  • Tutorials
  • Calculators
    Fundamentals
    Circuits
    • LED Series Resistor
    • 555 Timer
    • Oscillator Capacitors
    • Op Amp Gain
    Tools
    • Battery Time
  • Support
    • Contact
    • Terms of Service
    • Privacy Policy
    • Refund Policy
    • Licenses
  • Shop
    • Back
    • 3D Printing
      • Back
      • All Filament
      • PLA Filament
      • PETG Filament
      • Speciality Filament
      • 3D Printer Tools
      • Replacement Parts
      • Nozzles
    • Components
      • Back
      • Relays
      • Power and Batteries
      • LEDs and Illumination
      • LCDs and OLEDs
      • Resistors
      • Capacitors
      • Connectors
      • Logic
      • Transistors
      • Diodes
      • ICs
      • Potentiometers
      • Motors and Drivers
      • Headers and Terminals
      • Buttons and Switches
    • Sensors
      • Back
      • Capacitive Sensors
      • Current Sensors
      • Temperature Sensors
      • Humidity Sensors
      • RFID
      • Infrared Sensors
      • Sensor Kits
    • Brands
      • Back
      • Arduino
      • Creality
      • Espressif (ESP)
      • Lilypad
      • Makey Makey
      • Wemos
    • Cables and Cable Management
      • Back
      • Heat Shrink
      • Hookup Wires
      • Cable Ties
      • USB Cables
    • Paper and Adhesives
      • Back
      • Hot Glue
      • Tape
      • Stickers and Labels
      • Sticker Paper / Vinyl
      • Card Stock
    • Tools
      • Back
      • Containers and Enclosures
      • Multimeters and Voltmeters
      • Soldering
      • Instruments
    • Development Tools
      • Back
      • Microcontrollers
      • Prototyping Boards
      • Wireless
      • Programmers
      • Development Kits
  • Tutorials
  • Calculators
    Back
    Fundamentals
    • Back
    Circuits
    • Back
    • LED Series Resistor
    • 555 Timer
    • Oscillator Capacitors
    • Op Amp Gain
    Tools
    • Back
    • Battery Time
  • Support
    • Back
    • Contact
    • Terms of Service
    • Privacy Policy
    • Refund Policy
    • Licenses
  • Contact
  • Directions

Currencies

Languages

Tutorials
3D Printing


How to Upgrade the Extruder on a Creality Ender 3 or CR-10 3D Printer

How to Upgrade the Extruder on a Creality Ender 3 or CR-10 3D Printer

  • 3D Printing
  • Creality
  • Ender 3
    Easy Difficulty Easy
    How To How To
    29 Jan, 2022
    Corey Corey
  • Required Materials
  • Step 1
  • Step 2
  • Step 3
  • Step 4
  • Step 5
  • Step 6
  • Step 7
  • Step 8
  • Step 9
  • Step 10
  • Testing

In this guide, we'll guide you through upgrading your plastic extruder assembly to an all-metal extruder. This quick and straightforward upgrade enhances filament feeding and improves overall print quality.
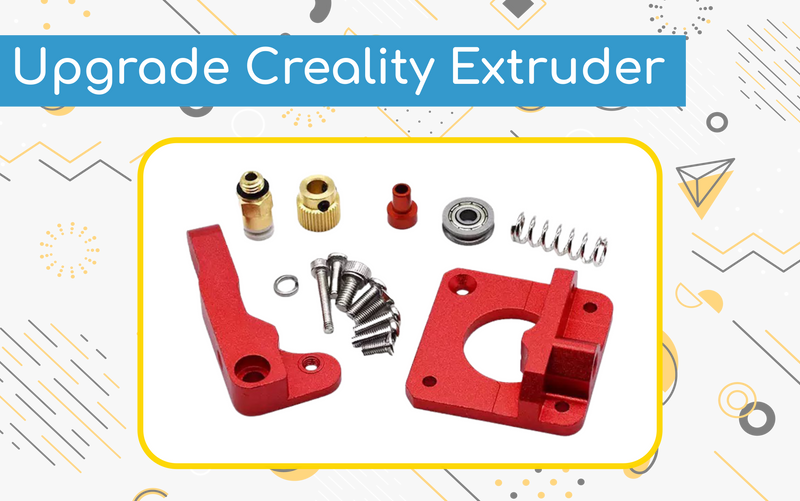
Required Materials

Youll need an extruder upgrade kit and while you're att it, its probably worth updating that PTFE tube. We've put links in below to where you can find them in the store.

Upgraded Creality All Metal Aluminium Extruder Kit

Upgraded Creality All Metal Aluminium Extruder Kit

Replacement PTFE Bowden Tube - 2 Meters

Replacement PTFE Bowden Tube - 2 Meters

  • ID: 2mm; OD: 4mm

Step 1

Unload any leftover filament from the extruder and turn the printer off. Also make a note of disconnecting the printer from mains power as an added safety precaution

Unscrew the retention coupling which connects the bowden tube onto the extruder assembly

Step 2

Take the 2.5mm allen wrench supplied with your 3D printer and remove the screw attaching the lever arm to the assembly while applying compression to the arm

Remove the arm and spring from the assembly

How To Upgrade Ender 3 Extruder Step 1

Step 3

Remove the spring retaining the spring from the assembly with your printers provided 2.5mm Allen key

How To Upgrade Ender 3 Extruder Step 2

Step 4

Remove the 3 screws that connect the extruder assembly to the sterpper motor with the 2.5mm allen key

Note that these screws are holding up the motor so be sure to support the motor when unscrewing to avoid damaging it

How To Upgrade Ender 3 Extruder Step 4

Step 5

The next step is optional although we provide a replacement motor gear and recommend you change it

To do this, Remove the two black grub screws using your printers smallest Allen wrench and then pull the gear off the motor

Now, attach the new gear thats provided in the kit and tighten the two black grub screws

Note: You may need to loosen the grub screws on the new gear before it will git onto the motor

How To Upgrade Ender 3 Extruder Step 4

Step 6

Attach the new metal extruder housing from the kit onto the motor and secure it using the three new screws provided

Ensure you use the conical head screw in the bottom right countersunk hole

How To Upgrade Ender 3 Extruder Step 6

Step 7

Install bearing onto the compression arm using the provided washer and screw

Attach the samllest round head screw onto the side of the extruder arm

How To Upgrade Ender 3 Extruder Step 7

Step 8

Attach the assembled arm onto the extruder base and secure it in place

Insert the spring between the arm and extruder end stop

How To Upgrade Ender 3 Extruder Step 8

Step 9

Insert the long screw into the extruder end stop and apply a medium tension on the spring and arm assembly

How To Upgrade Ender 3 Extruder Step 9

Step 10

Lastly, screw the bowden coupler into the extruder assembly and reinsert the bowden tube into the coupler

How To Upgrade Ender 3 Extruder Step 10

Testing

You're all done! Now time for a quick test

Firstly check if the extruder gear is lined up with the filament path. If its too low, loosen the grub screw slightly and move the gear upwards while compressing the lever arm

Lastly, rotate the motor to ensure that its able to push filament though. Also pull on the filament slightly to ensure it cant just slip through freely. If it does, untighten the screw holding the lever arm to increase the tension on the filament
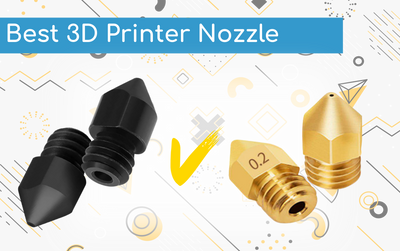

Similar Articles

Brass vs Hardened Steel 3D Printer Nozzles: Which Should You Choose?

Brass vs Hardened Steel 3D Printer Nozzles: Which Should You Choose?

January 31, 2022 Fundamentals

Hey there! Thanks for stopping by


We hope you found what you were looking for and were able to step away knowing just that little bit more

Founded by a group of electrical engineers, Kobee's main goal is to simplify electronics design and home automation and making it accesible to everyone, not just the engineering community. In many of our own personal maker journeys we were able to benefit from the amazing open source and community driven content generated by savvy makers all over the world. Though, the issue we always found is that although the content was readily available, the documentation and explanation was sometimes barebones and better suited to the experts that designed it in the first place. We're looking to change that! To explain it as simply and as clearly as we can and to pay it forward to the open source community that we all love 

So what can you expect from us? Its unlikely you'll find an in depth explanation of laplace transform here and we're probably not going to delve into the world of imaginary numbers (Sorry). But, if you're looking for straight forward, to the point and simple to understands tutorials, explanations and project examples; we think we just might have you covered.

Our community is at the heart of what we do, so if you have any comments or questions leave them in the comments down below or use the Contact Us Form to get in touch. We'll do our best to help each and every one of you

- Kobee
License:

CC BY-SA 4.0

Leave a comment

Tutorial Navigation
  • Required Materials
  • Step 1
  • Step 2
  • Step 3
  • Step 4
  • Step 5
  • Step 6
  • Step 7
  • Step 8
  • Step 9
  • Step 10
  • Testing
Sign up to The Hive

...and receive a 10% off coupon for your next shop

Kobee
Got questions? Give us a call 02 9052 0295
Mail Us Suite 1894, Shop 49
399 Melton Highway Taylors Lakes VIC 3038
Quick Navigation
  • Shop
  • Tutorials
  • Calculators
  • Support
Customer Care
  • Contact
  • Terms of Service
  • Privacy Policy
  • Licenses
  • Refund Policy

© 2025 Kobee. All Rights Reserved

Product successfully added to your Shopping Cart

Continue Shopping
Proceed to Checkout

Sample Product

Login

Welcome back! Sign in to your account

Create New Account Forgotten Password?

Reset Password

We will send you an email to reset your password.

Cancel