
How to Install the CH340 Driver on Windows, macOS, and Linux

Introduction
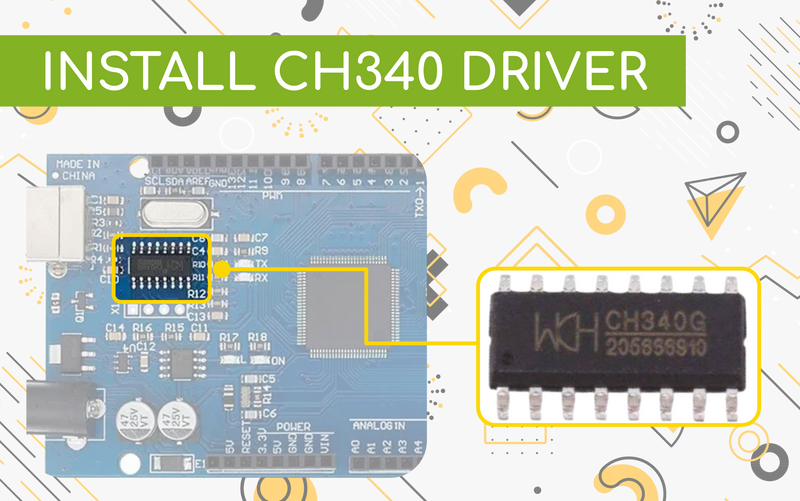
The CH340 line of chips is often found on microcontroller breakout boards and acts as the communication device between your computers USB to the microcontrollers serial.
Most computers will automatically have this driver installed although, for those who don't, this tutorial will take you through the steps required to get it installed and get your devices talking to each other
You may have either the CH340G or the CH340C variant of the chip. Both work in the same way and use the same drivers although the G variant requires a seperate external crystal oscillator for timing and the C variant uses an internal one
Required Materials
Depending on which board you have, the CH340 chip may be populated. Below are a number of boards we stock that use it


Drivers
The driver works with both Windows, Mac and Linux based PCs. We've provided a quick link to the latest drivers below
Alternatively you can visit the manufacturers website and browse and download the drivers directly:
Installing on Windows
Download and run the executable
Click the UNINSTALL button to ensure any old drivers are cleaned. Then, click the INSTALL button.

Driver Verification
Theres a few ways to check if the driver installed properly so you dont spend hours scratching your head. Plug your CH340 based device into your computers USB port and follow one of the below checks
Option 1: Checking through device manager
After the driver is installed and your device is plugged in the CH340 should enumerate to a one of your computers COM ports
Open device manager by opening the Start Menu and typing Device Manager

After opening the device manager, expand the Ports (COM &LPT) tree section. The CH340 chip should show up as USB-SERIAL CH340 (COM##) where the ## will be a random number depending on your individal computer
Option 2: Checking through Arduino IDE
If you have the Arduino IDE installed you should be able to see a change in the number of COMs ports available with and without the CH340 device connected. Firstly, without the CH340 device connected to your computer, open Tools > Port and observe the number of Serial ports available

Next, connect the CH340 device to your computer and recheck the available serial ports. You should notice a new port that wasnt their previously, this is your new CH340 device connected and communicating with your computer

Installing on MAC
Open the terminal program by going to Go > Applications

Open the terminal program in Utilities > Terminal

You'll now need to point your terminal to where the *.kext files are stored
- For MAC OSX v10.8 and below, use the following command:
cd /Library/Extensions - For MAC OSX v10.8 and below, use the following command:
cd /System/Library/Extensions
In this example we will be using a version higher than V10.9 so we will be using the first command

To check if the CH340 driver is in the correct path, use the following command to show the contents of the folder
ls
Now check for the CH340 driver files use the following command
ls | grep usb
You should see something that resembles the below. If you see either usb.kext or usbserial.kext), the CH340 driver is installed

If you found the above files in the path, we'll start by deleting them to prepare for installing the new drivers. Run the following commands to delete the drivers
sudo rm -rf /Library/Extensions/usb.kext
sudo rm -rf /Library/Extensions/usbserial.kext
Now its time to install the new driver. First download and extract the following driver:
Now, open the .pkg file in the unzipped folder and follow the instructions to install. You will need to restart your computer
Driver Verification
Use one of the following methods to verify if your driver has been successfully installed
Option 1: Through Command Line
With the CH340 device unplugged, open the terminal by going to Applications > Utilities > Terminal

Next, run the following command
ls /dev/cu*
You will see a list of devices connected to your MAC. You should see something similar to the below

Connect the the CH340 device to your MAC and run the command again. You should see the CH340 device show up in the terminal. The device should show up as /dev/cu.wchusbserial*** the number will be different depending on your individual computer

Option 2: Through the Arduino IDE
If you have the Arduino IDE installed you should be able to see a change in the number of COMs ports available with and without the CH340 device connected. Firstly, without the CH340 device connected to your computer, open Tools > Port and observe the number of Serial ports available

Next, connect the CH340 device to your computer and recheck the available serial ports. You should notice a new port that wasnt their previously, this is your new CH340 device connected and communicating with your computer

Installing on Raspberry Pi (Raspbian)
Run the following commands in the terminal. After running, the latest CH34O drivers should be installed
sudo apt-get update
sudo apt-get upgrade
Installing on Linux
Download the CH340 linux Zip file with the following link
Driver Verification
Option 1: Through Command Line
Plug the device into your computer and run the following command
ls /dev/ttyUSB*
The port should show up as a result

Option 1: Through Arduino IDE
If you have the Arduino IDE installed you should be able to see a change in the number of COMs ports available with and without the CH340 device connected. Firstly, without the CH340 device connected to your computer, open Tools > Port and observe the number of Serial ports available

Next, connect the CH340 device to your computer and recheck the available serial ports. You should notice a new port that wasnt their previously, this is your new CH340 device connected and communicating with your computer


Similar Articles
Hey there! Thanks for stopping by
We hope you found what you were looking for and were able to step away knowing just that little bit more
Founded by a group of electrical engineers, Kobee's main goal is to simplify electronics design and home automation and making it accesible to everyone, not just the engineering community. In many of our own personal maker journeys we were able to benefit from the amazing open source and community driven content generated by savvy makers all over the world. Though, the issue we always found is that although the content was readily available, the documentation and explanation was sometimes barebones and better suited to the experts that designed it in the first place. We're looking to change that! To explain it as simply and as clearly as we can and to pay it forward to the open source community that we all love

So what can you expect from us? Its unlikely you'll find an in depth explanation of laplace transform here and we're probably not going to delve into the world of imaginary numbers (Sorry). But, if you're looking for straight forward, to the point and simple to understands tutorials, explanations and project examples; we think we just might have you covered.
Our community is at the heart of what we do, so if you have any comments or questions leave them in the comments down below or use the Contact Us Form to get in touch. We'll do our best to help each and every one of you